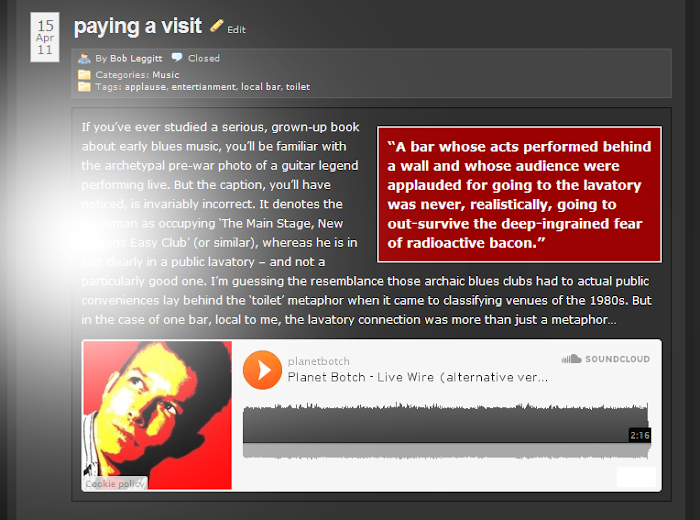
You may already know that it’s possible to upload mp3 audio files directly to your WordPress.com blog by paying for an upgrade. But did you know you could also put audio into your posts for free?
I've already posted a generic article on free mp3 streaming, but in this piece I’m going to explain how to add your mp3 file specifically to a WordPress post, so your visitors can simply click an audio player to instantly stream and hear it. WordPress.com is different from other blogging platforms in that it doesn't allow Javascript within posts, which is the main reason I feel it's necessary to provide a WP.com-specific audio streaming tutorial. Please note that if you're reading the https version of this page, streamers without https functionality may not display or work.
I’m going to cover three methods. The first is the easiest and nicest, but the host limits you to a maximum of two hours’ upload time. This method uses the file host SoundCloud, and its special WordPress.com integration.
METHOD 1
To add your mp3 using SoundCloud, first check out the SoundCloud terms, and sign up for a free account if you’re happy to do so.
Open your WordPress Post Editor, with the HTML (as opposed to the Visual) tab set active, then open SoundCloud in a new browser tab or window.
Now upload your mp3 to SoundCloud. Once you’ve uploaded, ensure that your track’s sharing option is set to Public, not Private. Then click Share at the top left of the track player, as shown below, and select the WordPress button from the menu...

When the new dialogue pops up, copy the shortcode SoundCloud provides, and paste it across into your WordPress post’s HTML Editor. You can see how it looks below...

In order to actually see the SoundCloud stream player, you need to Preview your post. The player doesn’t show in the Visual Editor in the way a photo would. So click Preview, test-play the track if you want, and once you’re happy, publish the post. This is how the mp3 looks and plays (the accompanying image is the profile pic I’ve uploaded to SoundCloud)...
METHOD 2
The second method is also really easy, and this time there’s no hard limit on the amount of mp3s you can upload. What’s not so cool here, is that when the visitor clicks your stream, they do hear the audio instantly, but they’re taken to a page on a separate site. That separate site is Tindeck – the place where you’ll be hosting your mp3 file. I prefer listeners to stay on the blog page when hearing my audio stream, so this method is less than perfect for me. In fact, Tindeck does offer a free stream player which would avoid the page transfer, but the stream player is script-based, and WordPress.com doesn’t run third-party scripts from within posts, so the player doesn’t load. It loads on Blogger and Tumblr no probs whatsoever, but not on the almighty diva of platforms that is WordPress.com.
To create your mp3 stream via Tindeck, make sure you’re happy with the Tindeck terms, and then sign up for a free account. Once again, make sure your WordPress HTML Editor is ready and waiting, then upload your mp3 file to Tindeck.
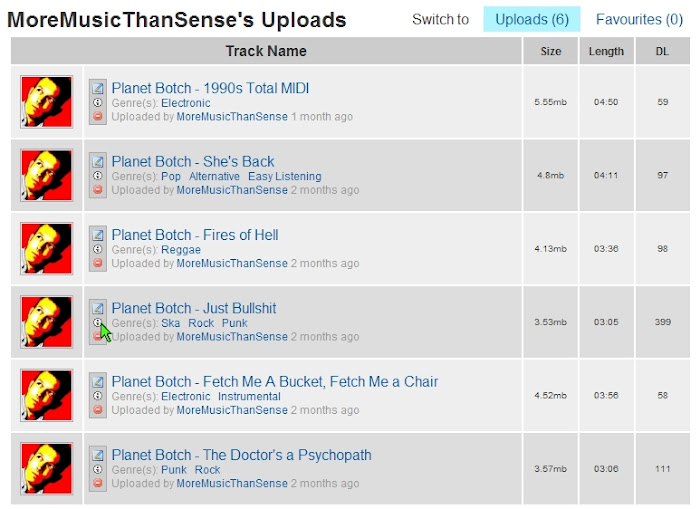
Once you’ve uploaded, go to your main Profile Page on Tindeck. This lists all the tracks you’ve uploaded. Pick the track you want to add to your WordPress post, and click the Link Code button. It’s the very small white button just below and to the left of the track title. I’ve marked it with a green pointer on the capture below…
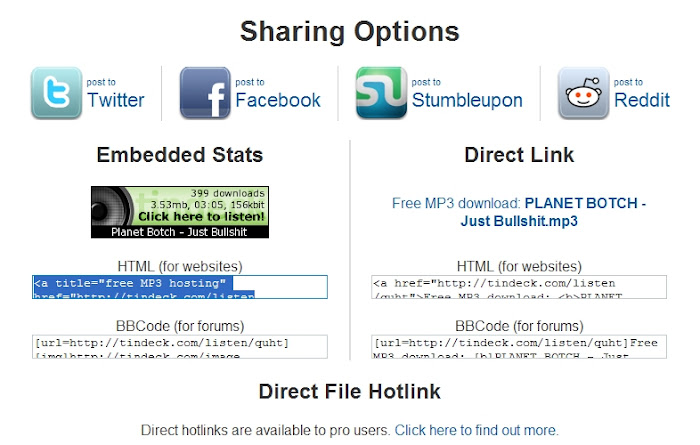
A new screen will now appear. On the left of the new screen, you'll see an Embedded Stats section. In this section, right-click and copy the code under HTML (for websites). It's the code highlighted in blue on the capture below...
Now just paste the code into your WordPress HTML Post Editor and publish the post when you're ready. What you've actually done is post a self-updating visual promo and link for your mp3, rather than an actual stream (because WordPress.com won't take a Tindeck stream). However, audibly, the effect of clicking the promo is exactly the same as clicking a stream player. It's just that the listener is transported to the track's page on Tindeck rather than staying on your blog page. Below there's an example of how the Tindeck method looks, sounds and works. Just backstep your browser when you want to return (and just to warn you, the big Download buttons on that Tindeck page are ads. If you do want to download the track, it's the small black button to the left of the track details)...
[UPDATE: The example sound stream was hosted on Tindeck. Since Tindeck closed in 2018, the stream is now inoperable..]
METHOD 3
[UPDATE: June 2017... Kiwi6 will delete your files after a period of time. Don't use kiwi6]
The final method uses WordPress's own audio stream player to play an mp3 hosted on Kiwi6. This time, there are no hard limitations on upload, and listeners will stay on your blog page. However, this method is slightly more involved as it requires you to modify a line of code in your WordPress HTML Editor. Remember though - no real upload limit, and the visitor stays on your blog - this is a proper hotlink. As such, it's a truly free and (basically) unlimited way to accomplish something WordPress charges you for.
Once again, check out the terms for the Kiwi6 host, and register once you're happy. Open your WordPress HTML Editor, then in another tab or window, make sure you're logged into Kiwi6 (you'll see your username at the top of the screen towards the right when you're logged in), and upload your mp3.
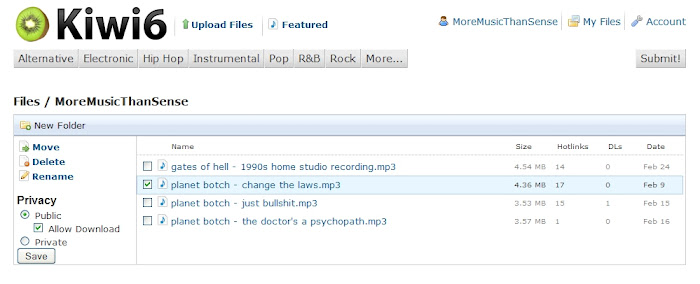
Now click on My Files in Kiwi6, select your track by placing a tick in its adjacent tick box, and ensure the Privacy setting is Public, with Allow Download also ticked. If Allow Download isn't ticked, the mp3 won't stream to WordPress when you hotlink it. It'll just say 'file not found' or something of that nature. You can see how the Privacy settings should look in the capture below.
If everything looks okay, click on the track title. That will take you to the mp3's specific page. Make sure the Share tab (as opposed to the Embed tab) is active, and then right-click the code below Direct Hotlink and copy it. It's the blue-highlighted line of code right at the bottom of the following capture...
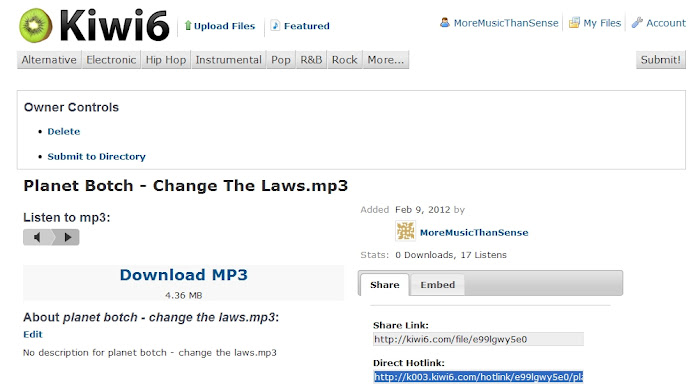
Paste the code into your WordPress HTML Editor. It should look something like this (although it won't be red - that's just me differentiating it)...
http://k003.kiwi6.com/hotlink/e99lgwy5e0/planet_botch_change_the_laws.mp3
You now need to add [audio in front of that code, and place a ] bracket at the end of it, so it looks like this...
[audio http://k003.kiwi6.com/hotlink/e99lgwy5e0/planet_botch_change_the_laws.mp3]
Your stream player is added. Click Preview to preview your post, test it if you wish, and publish your post when you're ready. This is very similar to what your visitors will see and get...
[UPDATE: The example sound stream was hosted on Kiwi6, but since deleted by the host. Don't use Kiwi6..]
RELATED POSTS (WORDPRESS)

